Showing posts with label decoupage bottles. Show all posts
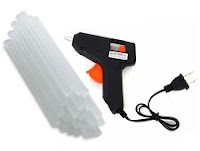
Glue gun is a great tool for crafters. It joins and fixes materials and things. Another genius thing is to use the glue gun adhesive for creating textures, making stencils, jewelry and molds.
Glue Gun and Glue Sticks used to create textures on recycled bottles by Anu Kriti
Glue Gun and Glue Sticks used to create textures 


I have used it to create textures and shapes on my altered bottles projects and the results are fantastic. 

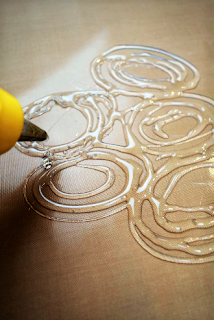
You can actually try it on a flat surface first to know how it actually works out for you in terms of flow and speed which is important to get the desired result (shape).

Try creating shapes with glue gun on a flat surface first before working on a bottle.
Try creating shapes with glue gun on a flat surface first

On my first project, I created some abstract lines on the bottles and filled in the spaces created with gesso textures, lace, and decoupages with paper in-between.


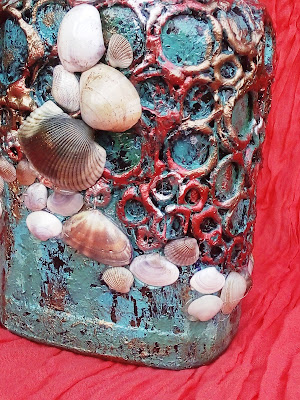
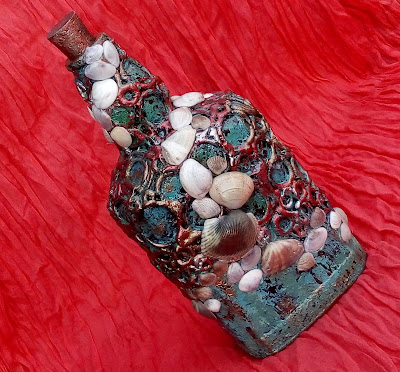
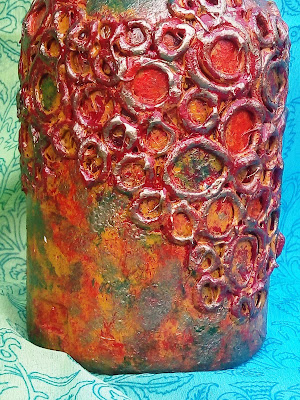
For the second project I randomly created circles of all sizes with the glue gun on the bottle. Since I was trying to create a ocean and sea life inspired bottle, I added sea shells on to them. The base done in sea blue and the circles highlighted with copper and bronze have really stood out and the complete piece is a marvel.

Circles created with glue gun on a recycled wine bottles
Circles created with glue gun
Sea shells and glue gun come together to create this recyled bottle by Anu Kriti
Finished bottle with textured created by glue gun adhesive


For my next project, I let the beauty of the random circles get accentuated with just depths of various shades and colors. And the result is again one of its kind.


Anu Kriti recycled this bottle by making random circles with a glue gun.
Wine Bottle with glue gun circles

Finished bottle with glue gun circles


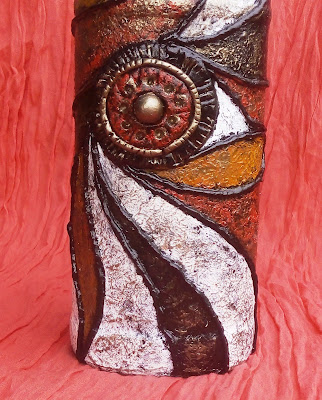
I again used the lines created by glue guns on two more bottles but this time, it was not completely random but coming out of  a center pattern and the final pieces are great!


Used glue gun to create lines on upcycled bottles


And last but not the least you can always use a glue gun to write a message on a bottle as  I did. 

Thank U written with a glue gun

Keep watching this space for some more fun ideas to create texture on the bottles.

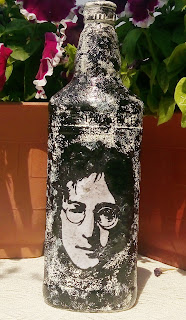
All of us have someone to inspire and fascinate us. This collection is all about the muses that we adore and idolize. Pick any of ours or let us know who inspires you and we upcycle a bottle for you. 

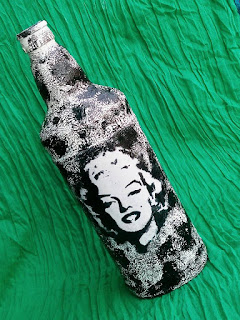
Have chosen the black and white color scheme to get the vintage look. The texture is created with gesso and black acrylic and then the print of the icon is decoupaged. Finished with acrylic varnish, this upcycled wine bottle makes a statement about you in your living space. 

The one and only Marlyn Monroe, decoupaged on a bottle finished with black and white texture.


This ucpcyled bottle has image of Marlyn Monroe decoupaged on it and the textured created with gesso and acrylic color.
Marlyn Monroe 
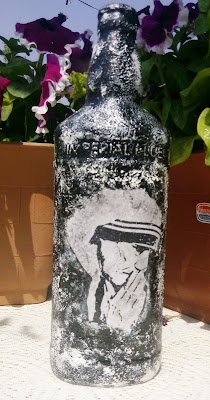
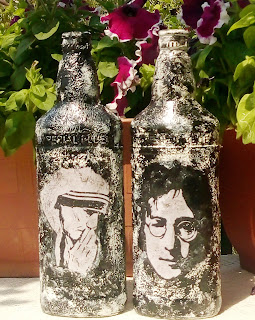
Mother Teresa - one of the greatest human beings that walked on this earth. Decoupaged on a bottle finished with black n white texture.


This recyled bottle has image of Mother Teresa decoupaged on it and the textured created with gesso and acrylic color.
Mother Teresa 

Famed singer-songwriter, the iconic John Lennon of Beatles fame, decoupaged on a bottle finished with black n white texture.
This recyled bottle has image of John Lenon decoupaged on it and the textured created with gesso and acrylic color.
John Lenon


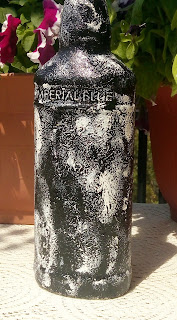
Back of recycled bottle by Anu Kriti
Back of the recycled bottle

Mother Teresa and John Lenon - recycled bottles by Anu Kriti. The images are decoupaged and added texture with gesso.
Inspirations


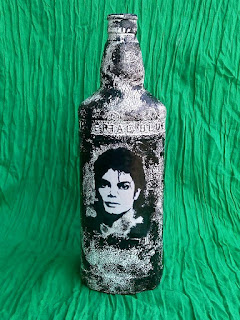
MJ - all time favourite - decoupaged on an upcycled bottle. 


This recyled bottle has image of Michael Jackson decoupaged on it and the textured created with gesso and acrylic color.
Michael Jackson 
Pick any of ours or let us know who inspires you and we upcycle a bottle for you. 
Contact details: +91 9310007286 or anu.kriti@yahoo.com


UpCycled Wine Bottles from Anu Kriti
The party over the weekend was a rocking one and what it has left is a whole mess to clean up and that includes empty wine or liquor bottles! These wine bottles usually find their way to a kabadiwala. But the creative you can actually transform these empty bottles into beautiful vases or simply deco art pieces. Believe me you won’t stop gushing with pride when your guests just can’t take off their eyes from your exclusive art pieces – the Upcycled Wine Bottles!

You can decoupage the bottles with paper or cloth or paper napkins or paint them with acrylic, spray or car paint or glass paints. Embellish them with all sorts of knick knacks lying around in your home or create your own embellishments. Here's how you can do it! 

Pick up a bottle that you like the shape of and clean it thoroughly. You can take off the labels by dipping the bottle overnight in soapy water. Most of the labels come off easily. For the stubborn ones use a coarse cloth. Clean the bottles in and out with soap water and turn them upside down to dry. 

I personally love decoupaging.  Every piece comes out with unique effect. Another bit I love to do is to give it a washed look. Here is how I do it.
  1. Take out any old magazine and tear out pieces of different sizes and shapes. Don’t use scissors. Don’t tear out too large or small pieces. 
  2. Now make the decoupage medium (mix adhesive and water mixture in rato of 1:1). 
  3. Start from one edge of the bottle and brush the surface with the decoupage mix and stick the magazine tear outs. Brush over with the adhesive mix. You can arrange the bits of paper in a pattern or random or whatever way you like. 
  4. Once, the whole bottle is covered, let it dry (usually one day). 
  5. Once it’s dry, coat it twice again with the decoupage medium, giving time in between to dry.

Now the fun part, how to give it a stone wash look!

Get thinner from a paint shop (a liquid used to thin paints). Dip some cotton and rub on the dried decoupage bottle. You will see the print ink coming off. The harder you rub, more ink colors will bleed. Rub it harder or softer depending on the amount of ink you want to rub off or keep on. Here is how it will look.

Decoupage bottle washed with thinner
Next you can decorate it. I have done up one with quilling. 


Decorated with quilling
For the other one, have simply tied a cord around the neck of the bottle and wrapped it around the mouth. 

Decorated with cord and buttons

Next technique is creating textures on the bottle like this one. 

Texture created with paper napkin
Have created texture with paper napkins. Since, we are going to apply color on top of it, so you can use even a cheaper toilet roll. Start from the step 3 as above but use paper napkin. Instead of keeping the surface plain, create textures. Create creases in the paper with brush while applying the decoupage medium. Coat it twice. Let it dry completely between layers. Once the intended texture effect is created, let it dry and then apply a coat of acrylic color. If need be apply another coat.

Now take some highlight color on a sponge and rub over the raised texture. You can do this with a flat brush as well. You will get this effect.

Highlight texture with a metallic color

 Embellish it the way you like. I have used some cords, buttons, cloth flowers, beads etc.  


Highlighted with metallic copper and embellished with cords, flowers and beads

Highlighted with metallic silver, embellished with cord and decorative buttons
Don’t forget to seal your art piece with a sealer (two coats). Do it before you add the embellishments. 

So, it’s time for your imagination to run wild, create your own masterpieces and bring joy to your living space with your own creations like these.

Check out Anu Kriti's collection of Upcyled Wine Bottles here

Powered by Blogger.